Upload receivers
You can check this video tutorial to upload metadata for receivers.
Metadata on receivers and deployments are part of a NETWORK PROJECT. Here an schema on the relationships between receivers and deployments.
Please follow these steps when uploading receiver information:
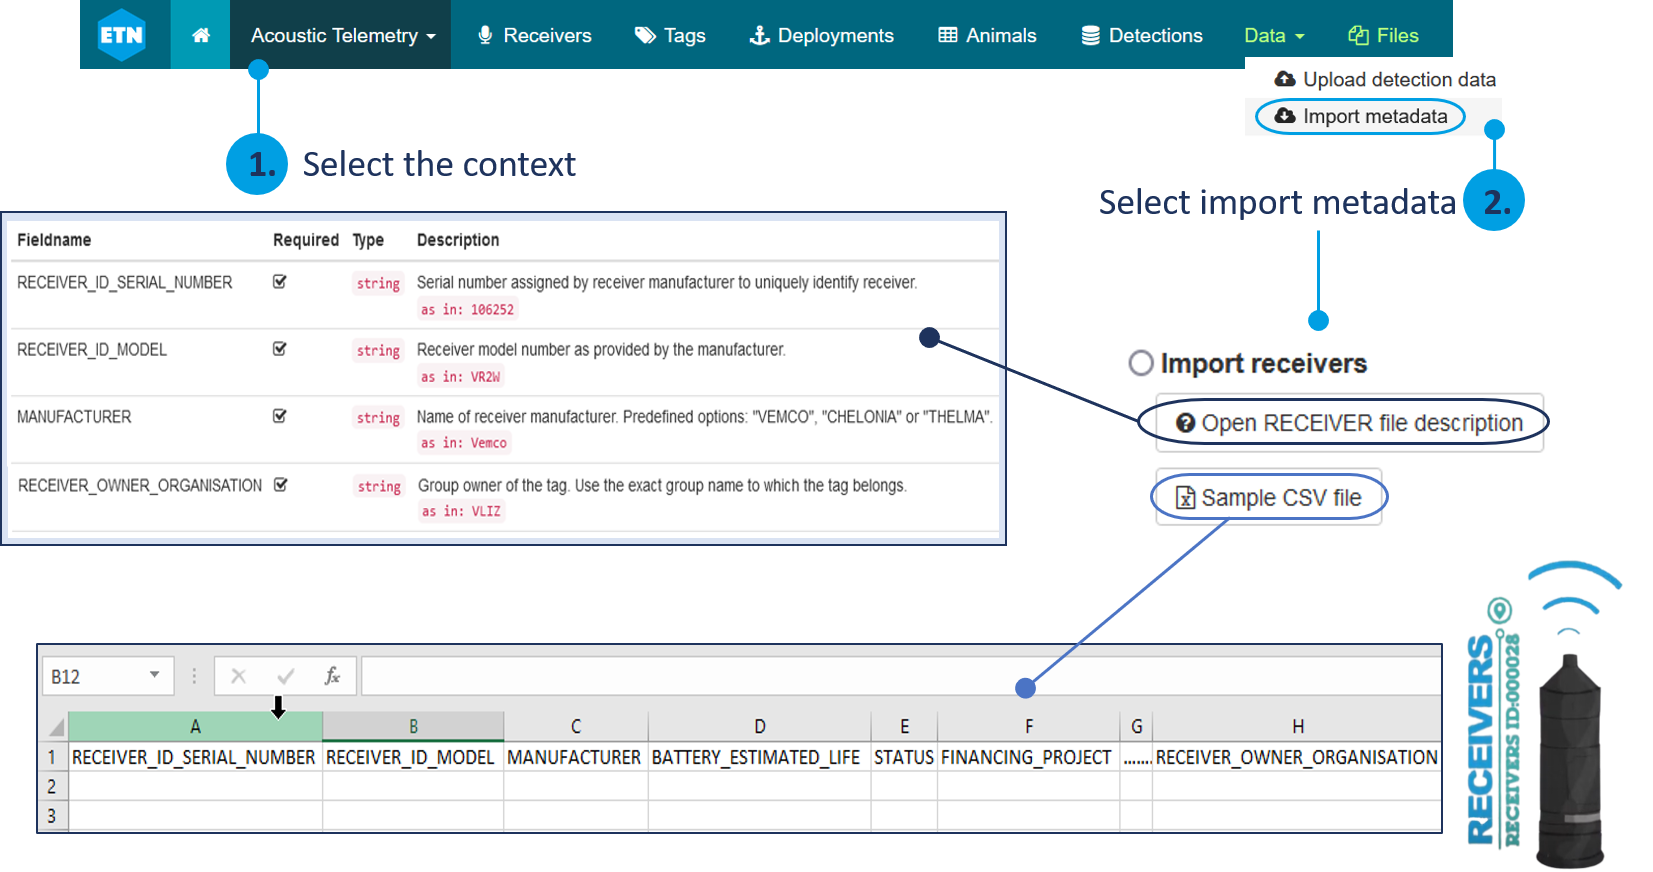
- Select the correct context for your project (according to technology type). Check the schema here. If not clear you can send an email to etn@lifewatch.be.
- Click ‘Data’ → ‘Import metadata’ in the landing page and you will be redirected to the webpage to upload the metadata.

-
Download the ‘Sample CSV file’ for RECEIVERS and carefully read the file description (Open RECEIVER file description).

-
Some fields are mandatory and some are optional. You can check them in the ‘RECEIVER file description’. The mandatory fields have a check mark next to them. Each file description contains the type of character expected for each field, and a description of the field with an example. Fill in as many fields as possible in the ‘.csv’ template following the explanations in the file description.
-
The file must be comma-separated. If it is not the case, this should be changed in the regional settings of the PC (Control panel → Clock, language & region → Region and language → Additional Settings).
-
-
When the ‘Sample CSV file’ is completed, it can be uploaded by selecting ‘Import receivers’ and uploading the file, ‘Browse’ → Select your file → ‘Start import’. After importing the ‘Sample CSV file’, either a success or an error message appears. If the file cannot be uploaded:
-
Check the error returned by the system. It usually indicates what type of incompatibility is present. Update your file accordingly and re-upload it.
-
If the error persists, contact ETN via the link ‘Contact us’ at the bottom of the landing page or by sending an email to etn@lifewatch.be. When contacting ETN, provide sufficient information on the issue, send along the file you wanted to upload together with a print screen of the error message.
-
-
Once a receiver is uploaded, it stays in the database and does not need to be uploaded again when it is used for another project.
-
The receiver status must be uploaded as ‘available’ before linking it to a deployment. The status becomes automatically ‘active’ when a deployment is linked to the receiver.